Power Hub Setup
The following image represents the setup procedure for the Power Hub MT340. If needed, text-based, step-by-step instructions are located below the image.
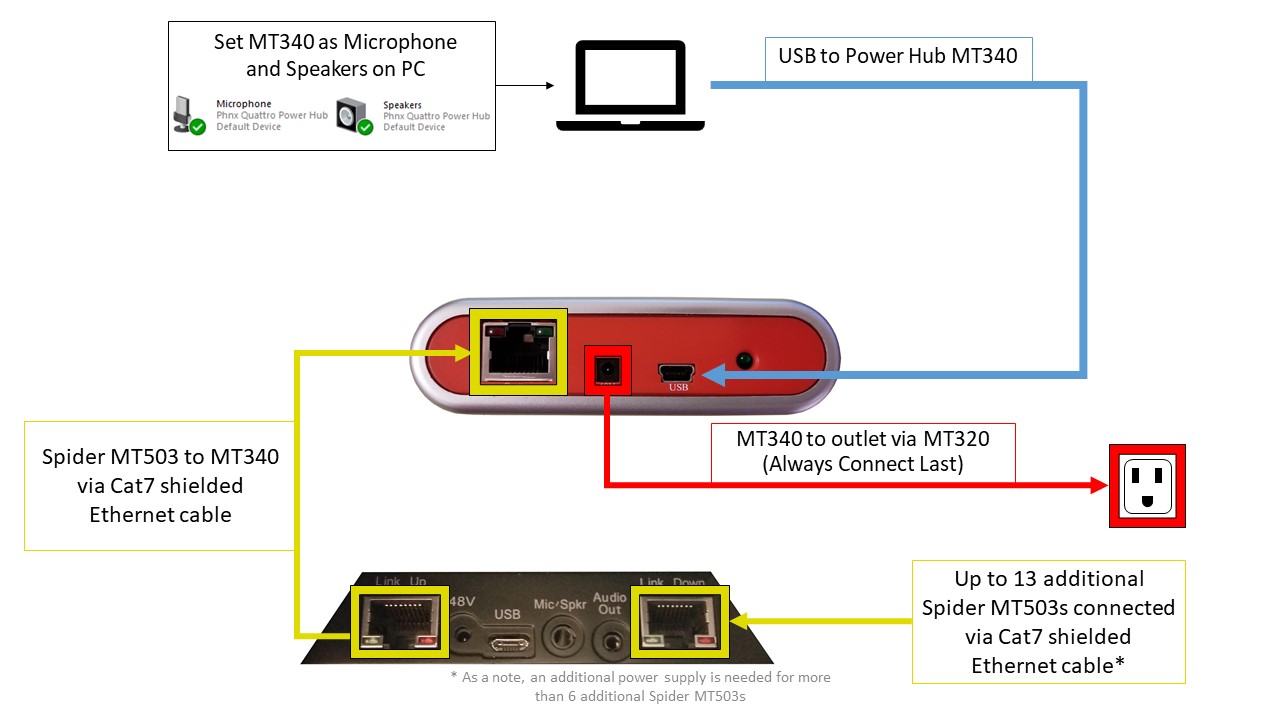
Power Hub MT340 Setup Instructions
- Connect the Spider MT503 to the Power Hub MT340 via Cat7 shielded Ethernet cable from the “Link Up” port.
- Up to 13 additional Spider MT503s can be daisy chained to the initial Spider MT503 via Cat7 shielded Ethernet cable.
- When daisy chaining Spider MT503s, make sure that the “Link Down” port of the initial Spider is connected to the “Link Up” port of the next Spider down the chain. Use this same method as you continue down the chain.
- An additional power source will be needed for more than 6 additional Spider MT503s.
- Up to 13 additional Spider MT503s can be daisy chained to the initial Spider MT503 via Cat7 shielded Ethernet cable.
- Connect the Power Hub MT340 to the computer via the mini-USB cable.
- Connect the Power Hub MT340 to an outlet via the Power Supply MT320 provided.
- Once the Power Hub MT340 has finished the boot-up process (the Spider MT503s in the daisy chain will play a four note boot-up sound), make sure to select the Power Hub MT340 as both the “Microphone” and “Speakers” within your computer sound settings.
- The Power Hub MT340 is listed as “PHNX Quattro Power Hub” within the sound settings.
- The Power Hub MT340 and daisy chained Spider MT503s are now ready for use with your video conferencing system!
- If using Zoom, please follow the instructions linked here for best results.

