Condor Optional Setup
The following image represents the optional video conferencing setup for the Condor MT600. If needed, text-based, step-by-step instructions are located below the image.
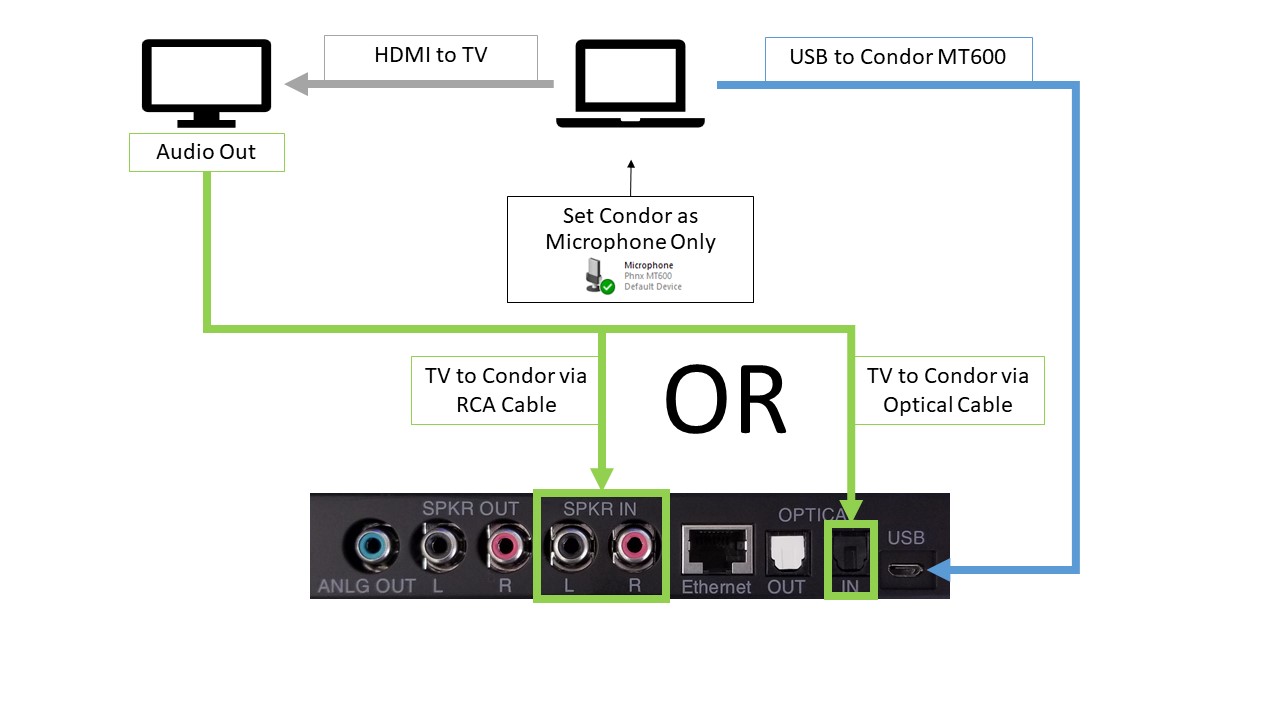
Condor MT600 Optional Setup Instructions
- Connect your computer to your television/display via an HDMI cable, if you have not already done so.
- Connect the Condor MT600 to your television/display via either an RCA cable to the “SPKR IN” port or an optical cable to the “OPTICAL IN” port.
- As a note, some televisions/displays will mute their internal speakers when using the “audio out” functionality. If this is the case, the Condor will need to be used with an external speaker/soundbar. For that setup, please refer to the “Condor Recommended Setup”.
- Making sure your television/display is turned on, proceed with plugging in the Condor to the computer using the micro-USB cable provided.
- If the Condor is brand new, it will boot up and attempt to automatically set the speaker delay for the AEC (Acoustic Echo Cancellation).
- If the Condor has been used previously, it will still go through the boot up process, but will not automatically set the speaker delay for the AEC. Please refer to step 5 for information on how to manually set the delay.
- Once the Condor has finished with the boot-up process, make sure it is only set as the “Microphone” within your computer sound settings.
- In order to ensure that the Condor has the correct speaker delay set, download the Phoenix Audio Testing Wizard and proceed through the steps, manually setting the delay as needed.
- The Condor MT600 is now ready for use with your video conferencing system!
- If using Zoom, please follow the instructions linked here for best results.

