Skype Room v2 System Audio Setup Guide – Stingray MT700 & Sennheiser TeamConnect SL Ceiling Array
Skype Room v2 System Audio Peripheral
Setup Guide
ABOUT SKYPE ROOM SYSTEMS
This solution allows you to transform any Skype for Business meeting space using a dedicated controller. Skype Room Systems v2 is intended for use with Skype for Business Server 2019, Skype for Business Server 2015, Microsoft Teams, or Skype for Business Online.
For additional Information visit this article.
Each Skype Room System requires the following items:
• Touchscreen control panel
• Skype Room Systems v2 application
• Dock/extender
• Peripheral devices (camera, microphone, speaker)
• External screens (maximum of two)
• HDMI Input
You can procure these components as preinstalled bundles, or you can purchase the supported
components individually by following this article.
Phoenix Audio recommends the following items/bundle:
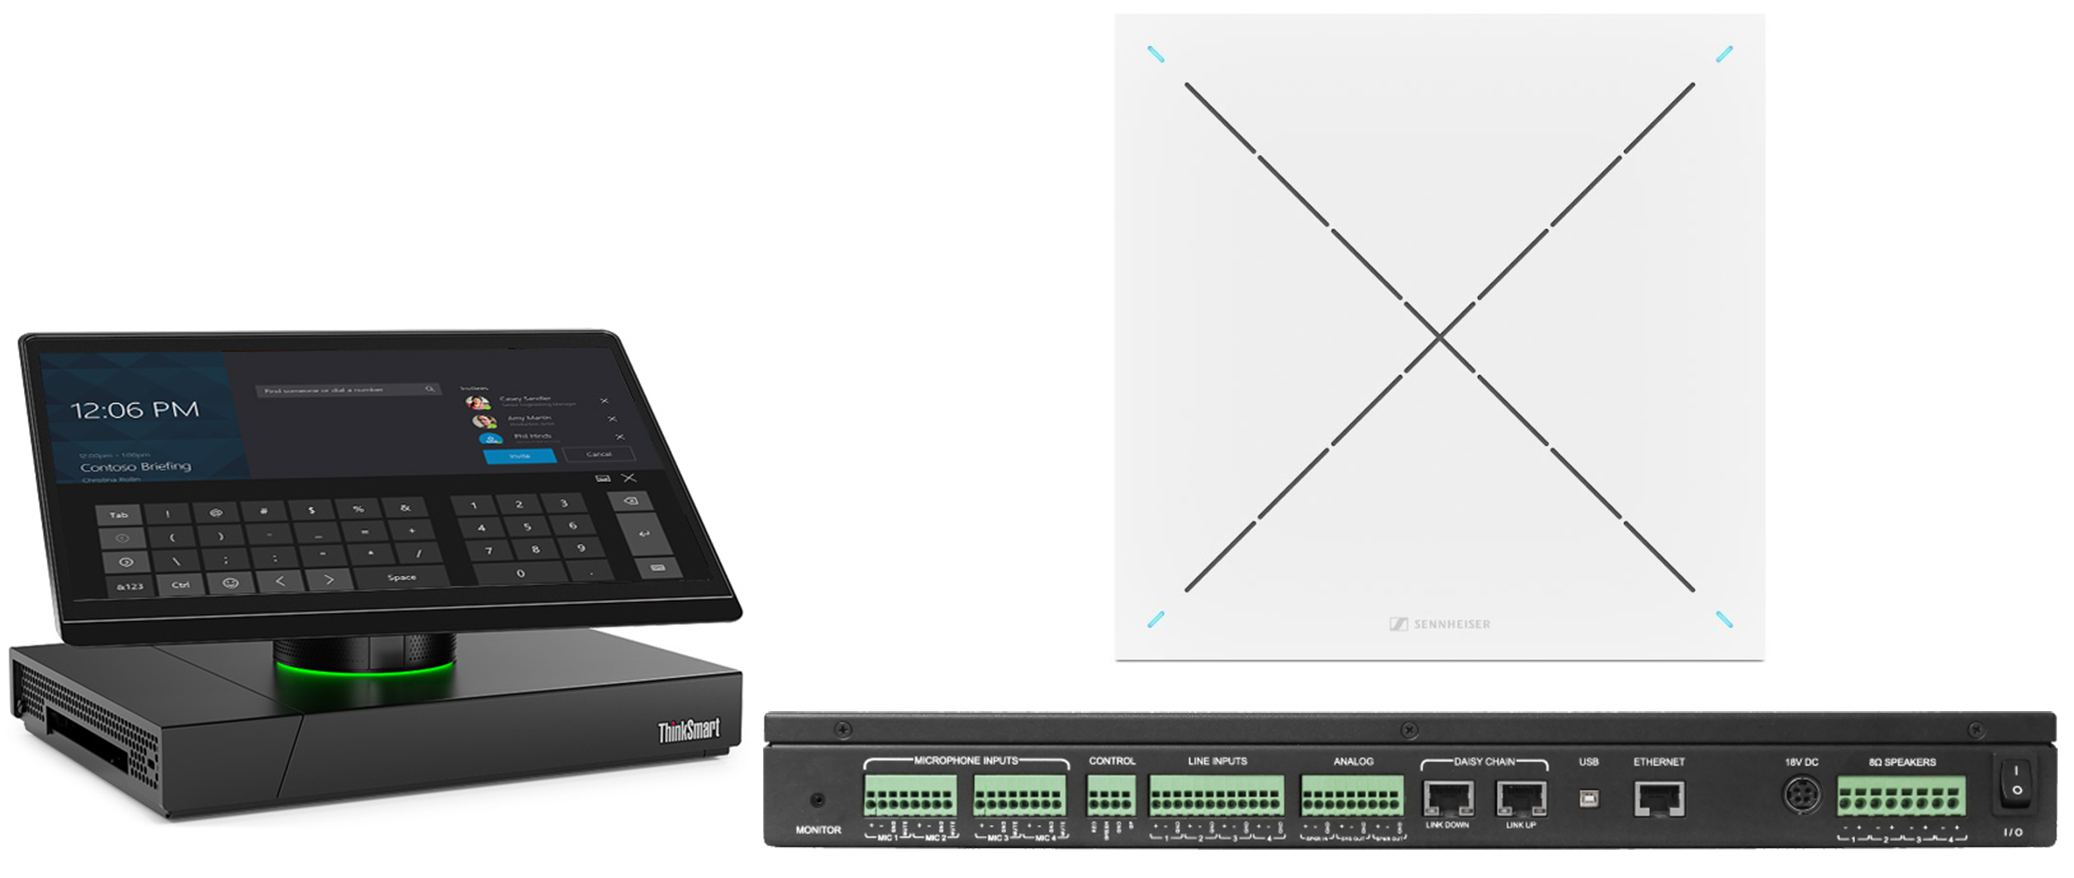
• Lenovo ThinkSmart Hub 500 – An all-in-one, easy to deploy Skype Room System bundle.
• Phoenix Audio Stingray MT700 – Easy to deploy DSP Mixer.
• Sennheiser TeamConnect SL Ceiling Microphone Array
• Amplified Speakers or unamplified wire 8ohm speakers
• HD USB Camera
• External screens (maximum of two)
|
SETUP CHECKLIST
|
|

SETTING UP AUDIO PERIPHERALS
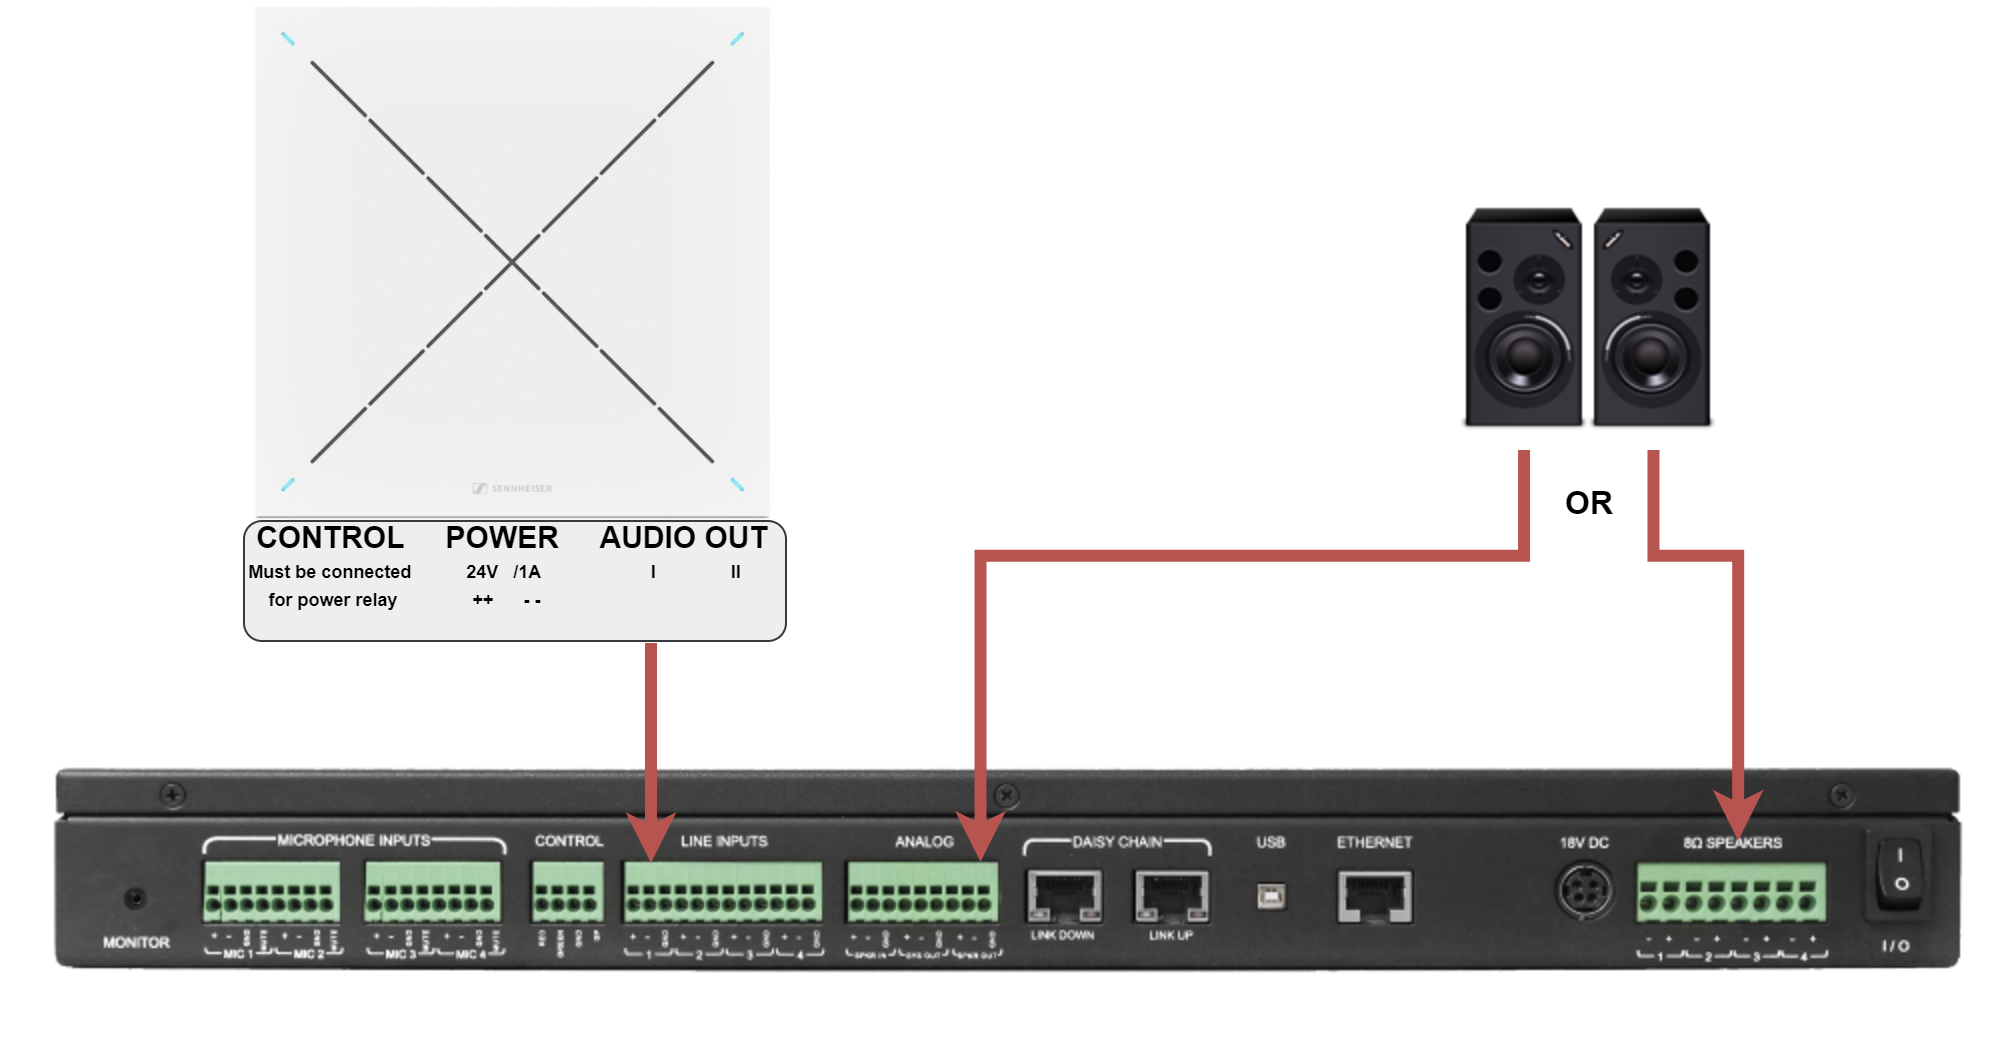
CONNECTING THE SENNHEISER CEILING MICROPHONE INTO THE STINGRAY MT700
STEP 1.
- Connect the Sennheiser Control Cable into the “Control” connector.
- Connect the Sennheiser Power Cable into the “Power” connector.
- Connect the Sennheiser’s “Audio Out” I or II into one of the Stingray’s line inputs.
- Connect amplified speakers into the Stingray’s “Analog/Speaker Out” connector or
unamplified wire 8ohm speakers into the Stingray’s built-in amplifier.
For Complete Setup Information follow this article.
CONNECTING THE SKYPE ROOM SYSTEM USING THE STINGRAY MT700
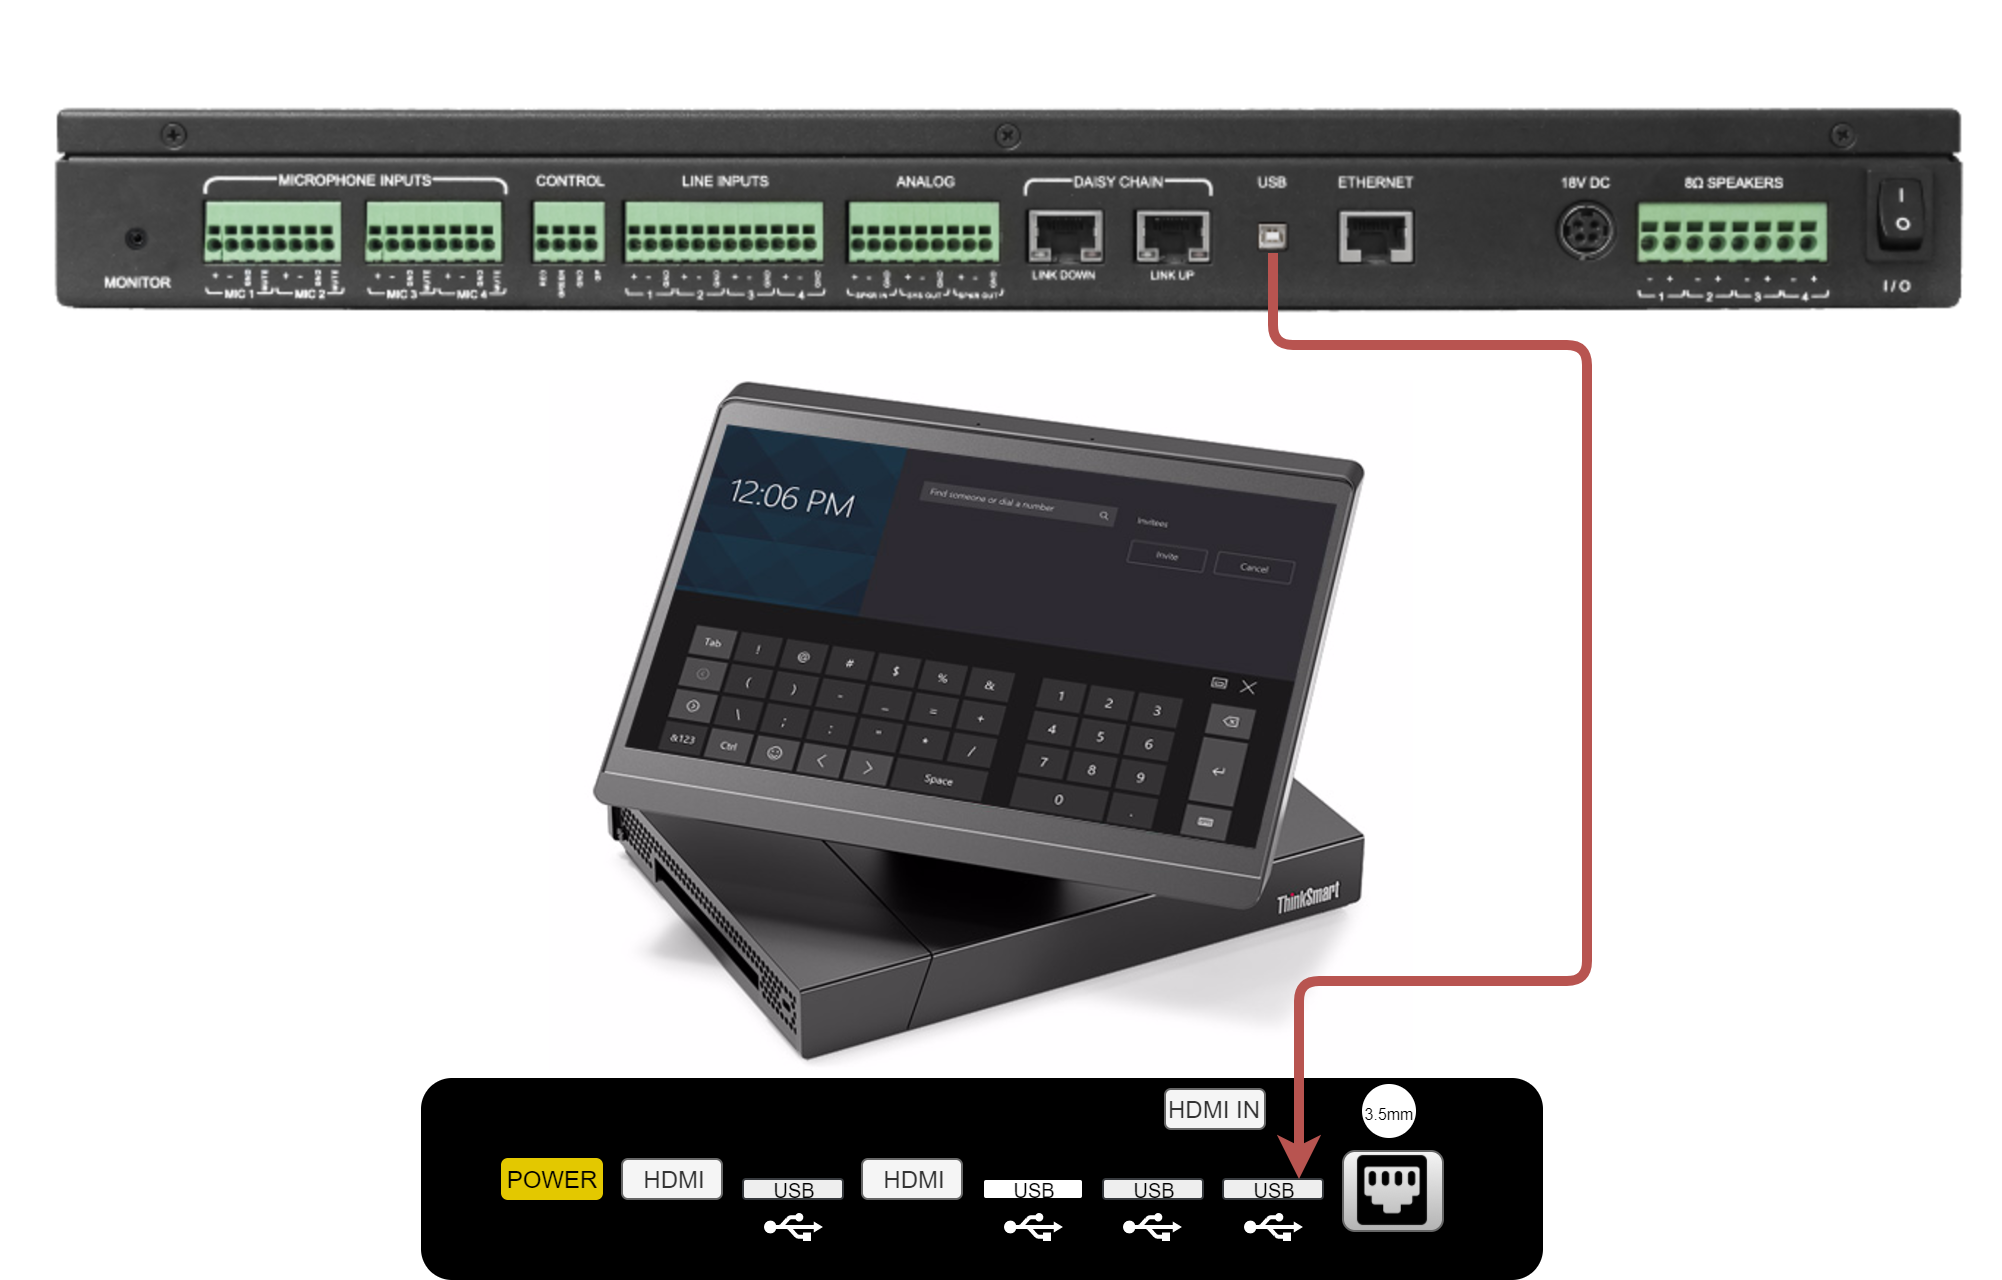
STEP 2.
There is only one required connection between the Stingray and your Skype Room System (the
following example uses the Lenovo ThinkSmart Hub 500).
- Connect the Sennheiser Control Cable into the “Control” connector.
- Connect the Sennheiser Power Cable into the “Power” connector.
- Connect the Sennheiser’s “Audio Out” I or II into one of the Stingray’s line inputs.
- Connect amplified speakers into the Stingray’s “Analog/Speaker Out” connector or
unamplified wire 8ohm speakers into the Stingray’s built-in amplifier.
CONFIGURING THE SKYPE ROOM SYSTEM
POWER ON AND ACCEPT THE MICROSOFT SOFTWARE LICENSE TERMS
STEP 1.
- Power on the Skype Room System – In this case the Lenovo ThinkSmart Hub 500.
- Please wait a few minutes while the device prepares all necessary software/drivers.
- Accept the Microsoft Software License Terms and click “Next”.

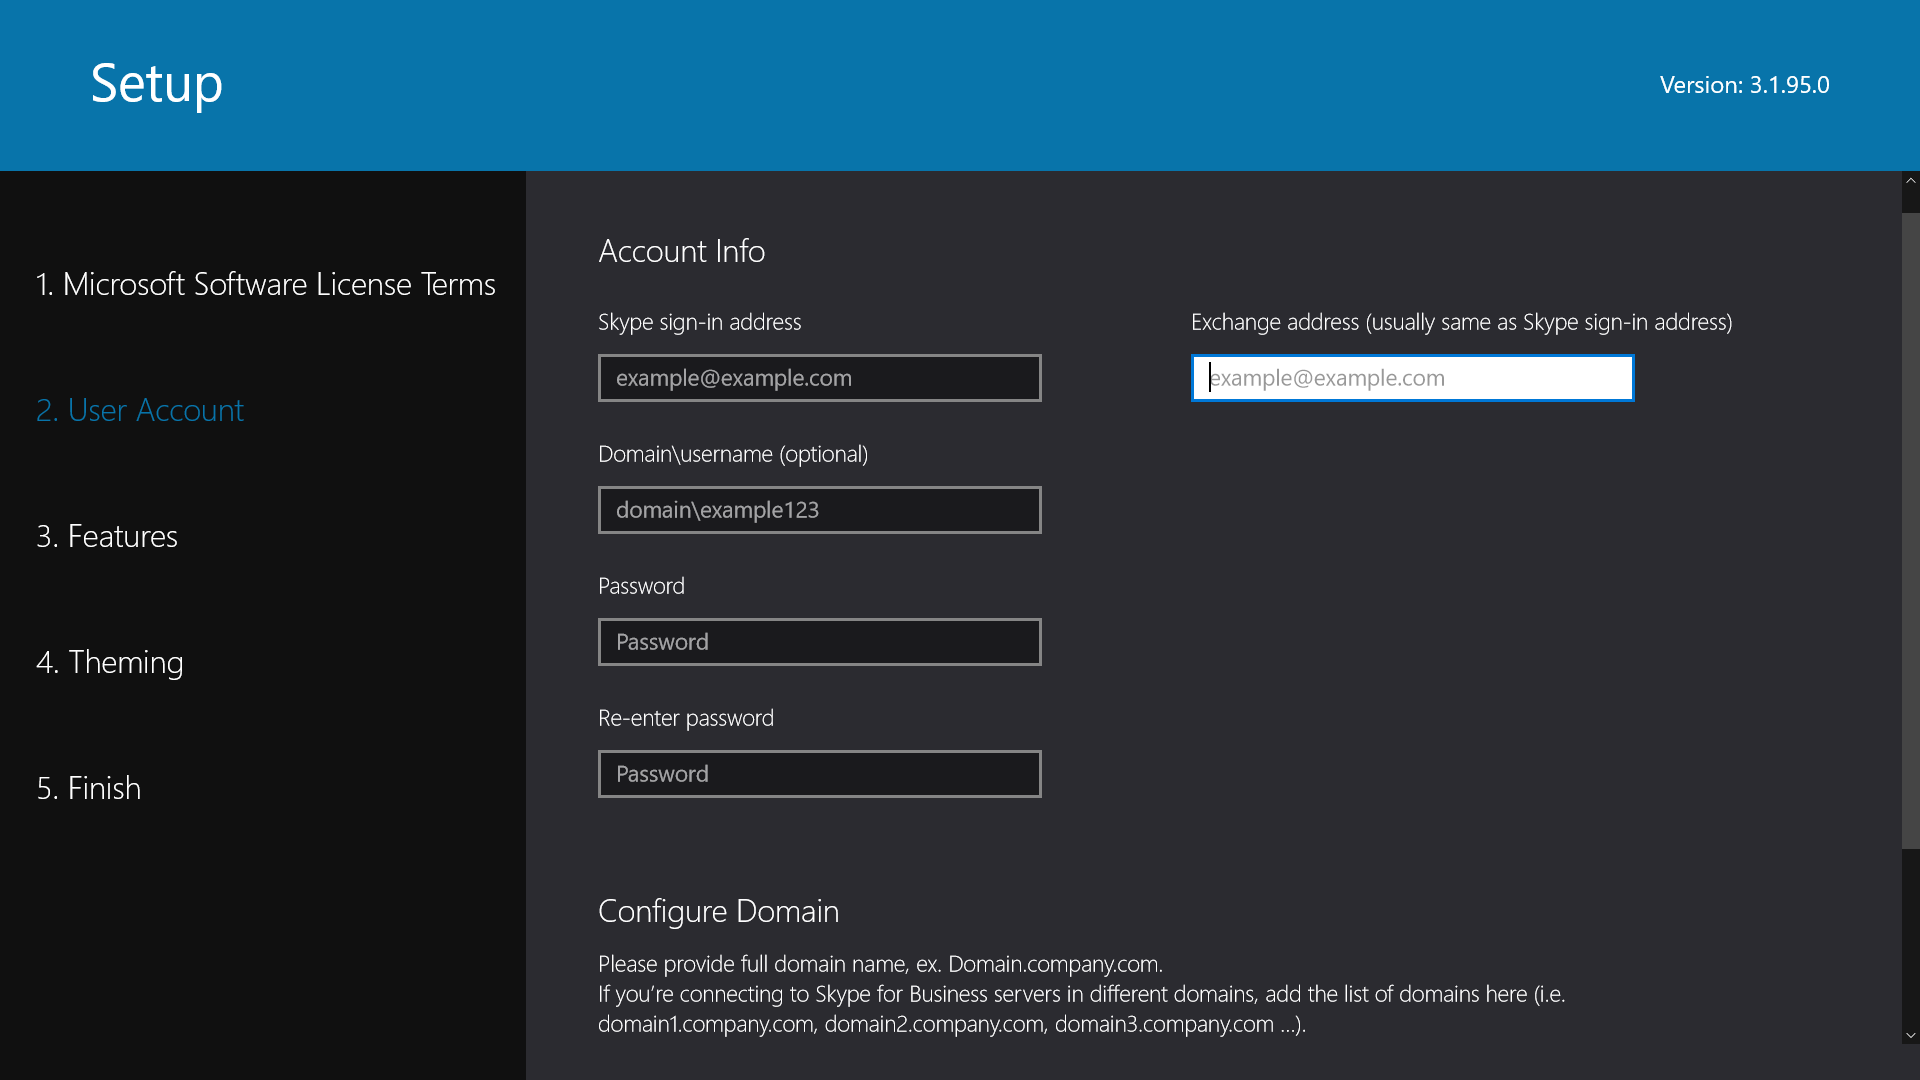
SETUP USER ACCOUNT
STEP 2.
- Enter a valid email/password and click “Next”.
* Please contact your IT Administrator for account details.
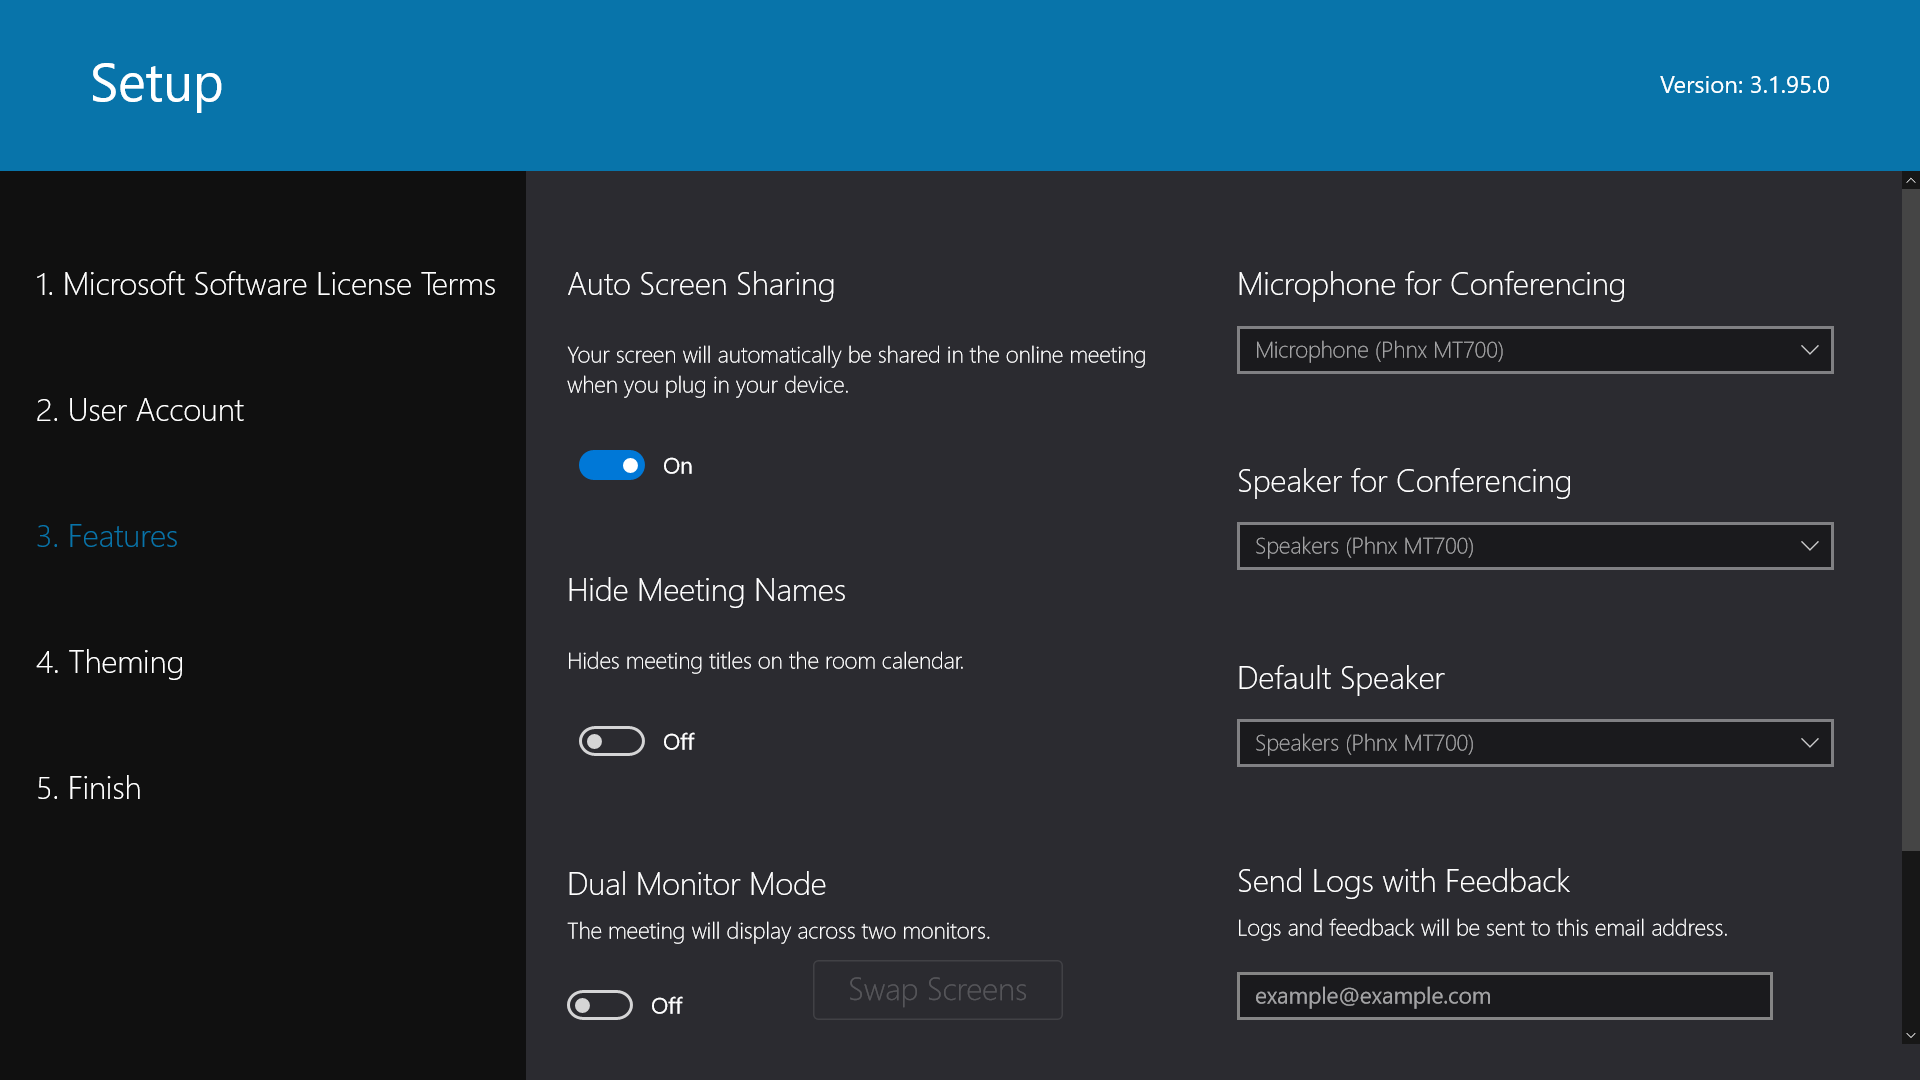
CONFIGURE AUDIO PERIPHERAL
STEP 3.
In the following screen, you will now be able to assign the Stingray as both the microphone and speaker.
- Enter a valid email/password and click “Next”.
* Please contact your IT Administrator for account details.
In the following screen, you will now be able to assign the Stingray as both the microphone and speaker.
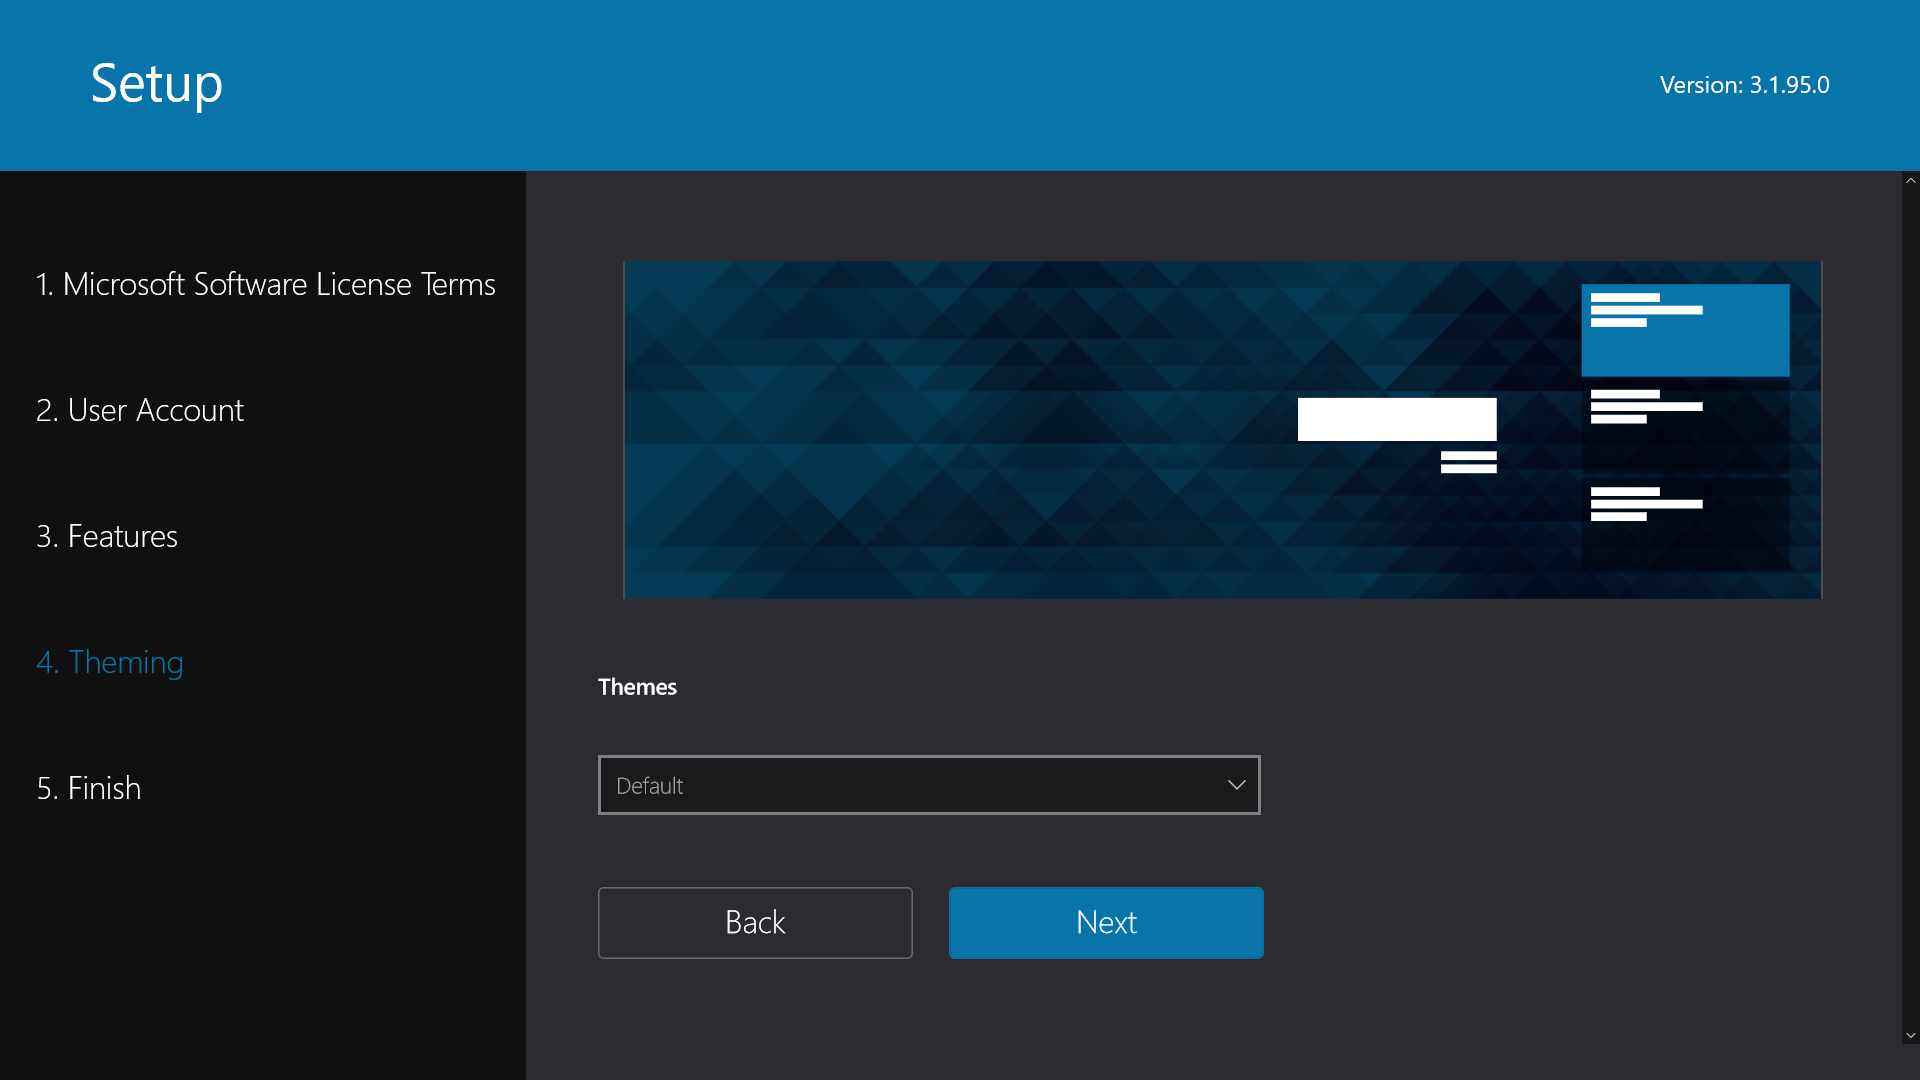
FINISH SETUP
STEP 4.
You will now be able to select a Theme and finalize the setup.
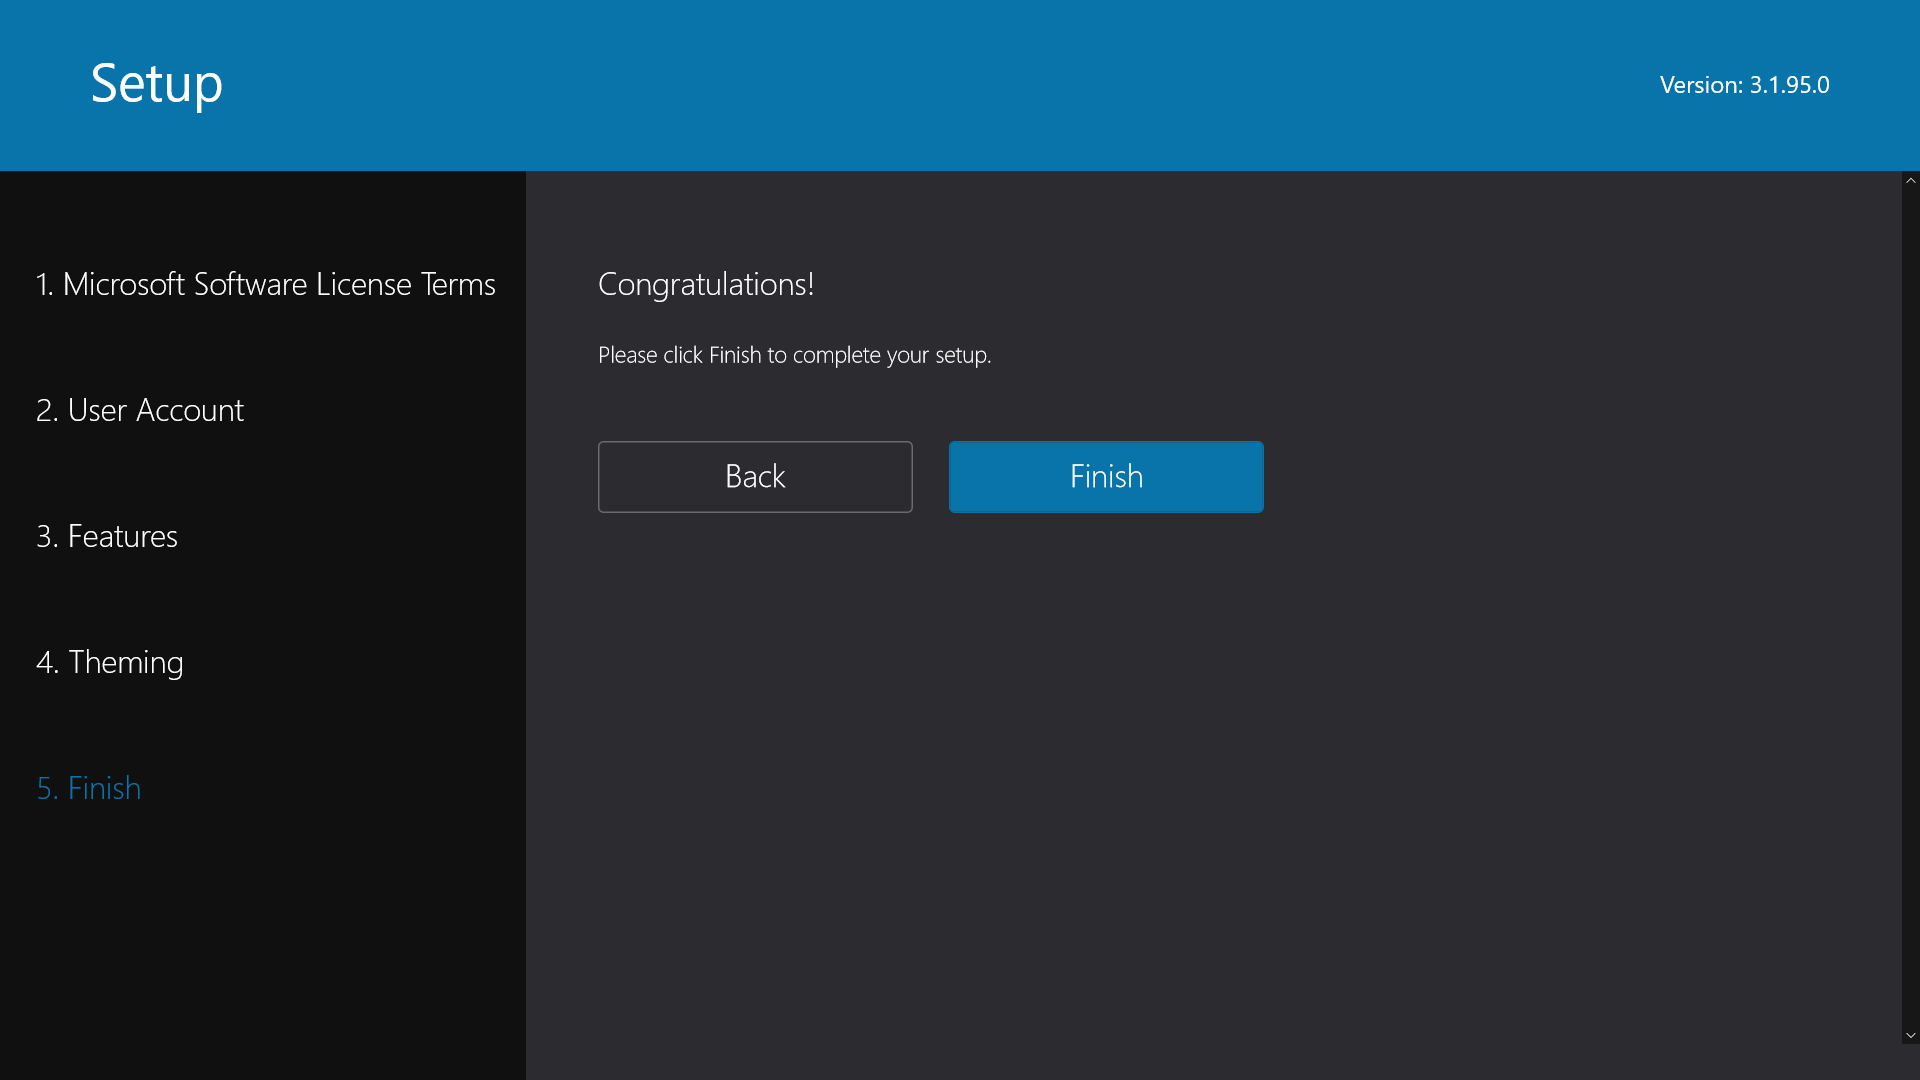
- Select a Skype Room Theme and click “Next”.
- Congratulations, you have now completed the setup and your Skype Room is ready to use.