Zoom Desktop Client Integration
Zoom Desktop Client
For information on getting started with the Zoom Desktop Client, please visit the following link:
https://support.zoom.us/hc/en-us/articles/201362033-Getting-Started-on-PC-and-Mac
- Launch the Zoom desktop client on either your Mac or PC
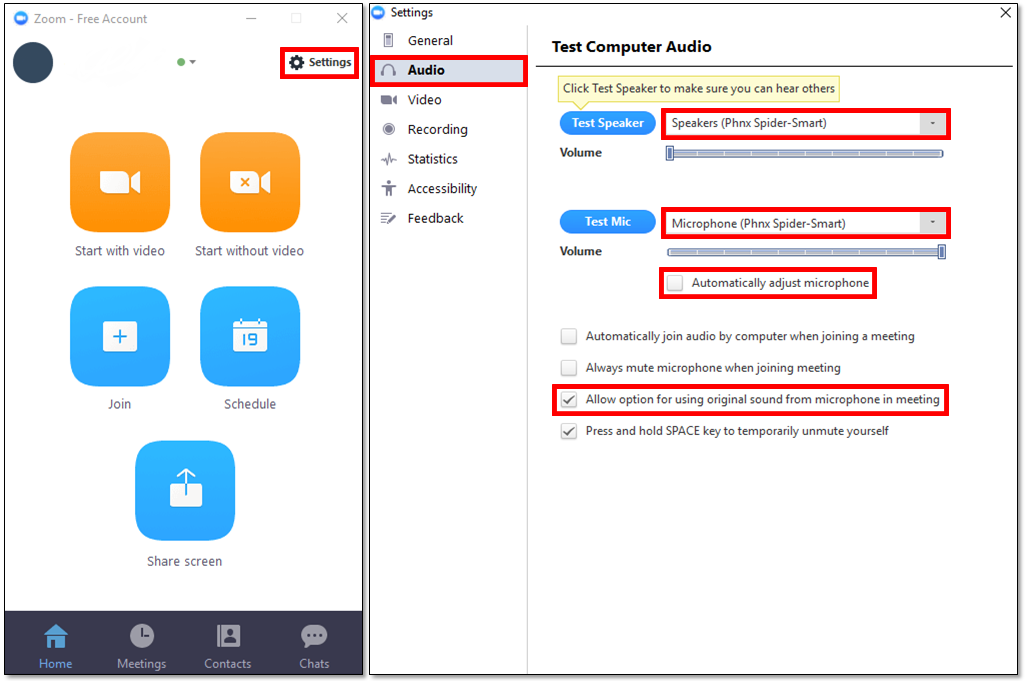
- After launching the application, select “Settings” –> “Audio”
- Select your Phoenix device for both the Microphone and Speaker selections
- Deselect “Automatically adjust microphone”
- Select “Allow option for using original sound from microphone in meeting” (if this option is unavailable, continue below to Advanced Settings for additional instructions)
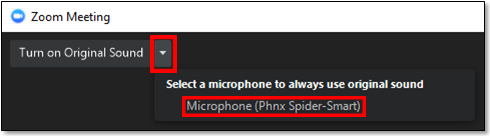
- When in a meeting, select the drop down menu next to “Turn on Original Sound”.
- Select your Phoenix device listed as the Microphone. From this point forward, Zoom will always use the original sound from the Phoenix device.
Advanced Settings:
- Log into the Online Portal as an Administrator (not to be mistaken as the desktop software application)
- Navigate under “Account Management” –> “Account Settings”
- Scroll down to “In Meeting (Advanced)”
- Select the option labeled “Allow users to select original sound in their client settings”
- This option will now become available when using the Zoom Desktop client application
- If you do not see this option you may need to log out and log back in

