Jive Communications Integration
JIVE Communications
STEP 1.
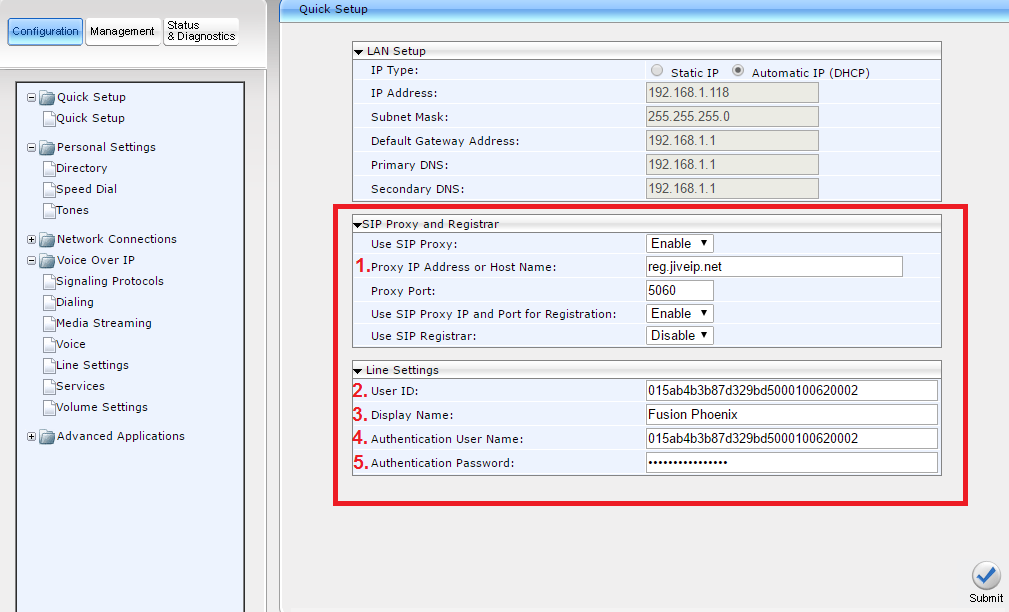
Log into the Spider’s GUI and access the <Configuration/Quick Setup Window>.
1. Enter JIVE’s Domain URL under <SIP Proxy and Registrar/Proxy IP Address or Host Name>
2. Enter JIVE’s Username under <Line Settings/User ID>
3. Enter a Display name, can be any name of your choice or the line extension.
4. Enter JIVE’s Username under <Line Settings/Authentication User Name>
5. Enter JIVE’s Password under <Line Settings/Authentication Password>
STEP 2.
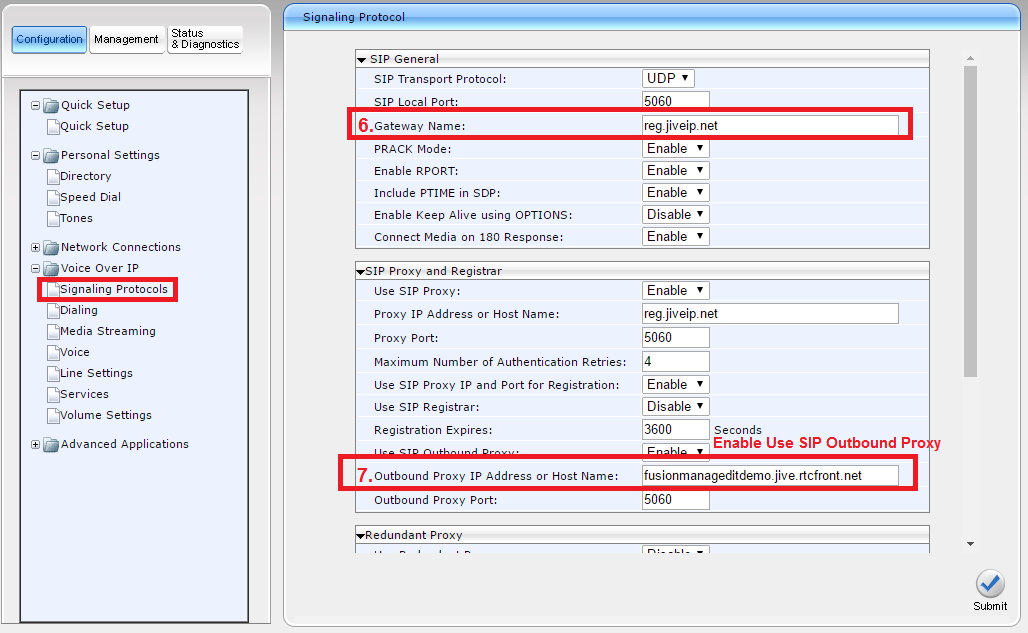
Navigate under <Voice Over IP/Signaling Protocols>
6. Enter JIVE’s Domain URL under <SIP General/Gateway Name>
7. Enable and Enter JIVE’s Outbound Proxy under <SIP proxy and Registrar /Use SIP Outbound Proxy>
See attached images


